


TL;DR
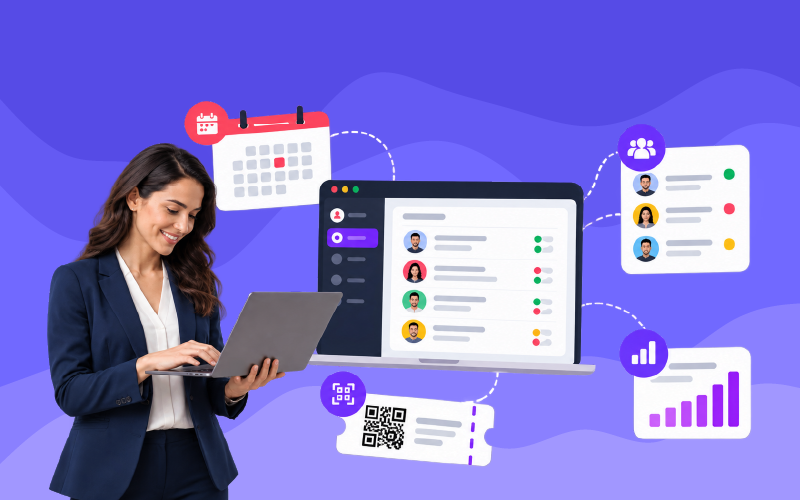
An event registration platform handles your whole event in one place. It makes the sign-up page, collects guest details, takes payments, sends confirmations, gives out QR tickets, checks people in, and shows you the results. It scales to large events and beats manual registration on speed, accuracy, and cost.
Introduction
Registration is the first thing attendees experience, whether your event has 50 people or 10,000. Event registration insights suggest that the implementation of event technology can boost attendance by 20% and increase productivity by 27%.
An event registration platform brings sign-ups, payments, confirmations, and check-in into one connected system.
What Is an Event Registration Platform?
An event registration platform is software that lets organizers create registration pages, sell or issue tickets, collect attendee information, process payments, and manage check-in, all from one dashboard. It replaces juggling spreadsheets, emails, paper forms, and payment tools.
Most platforms support a range of events:
- Conferences and trade shows: multiple ticket tiers and session selection
- Webinars and virtual events: registration unlocks a unique access link
- Workshops and training: limited capacity
- Fundraisers and galas: donations, table sales, and guest lists
- Community events and meetups: simple, free sign-ups
The goal is always the same: make sign-up easy and give organizers real-time data on who is coming. That’s why registration is now a foundation of event operations. According to the 2024 Community Brands Event Trends Study, event registration was the most widely used event technology, with 41% of event planners reporting its use.
How Does Event Registration Software Work?
Each stage feeds the next, so sign-up data carries through to tickets, check-in, and reports. Here’s how it works.
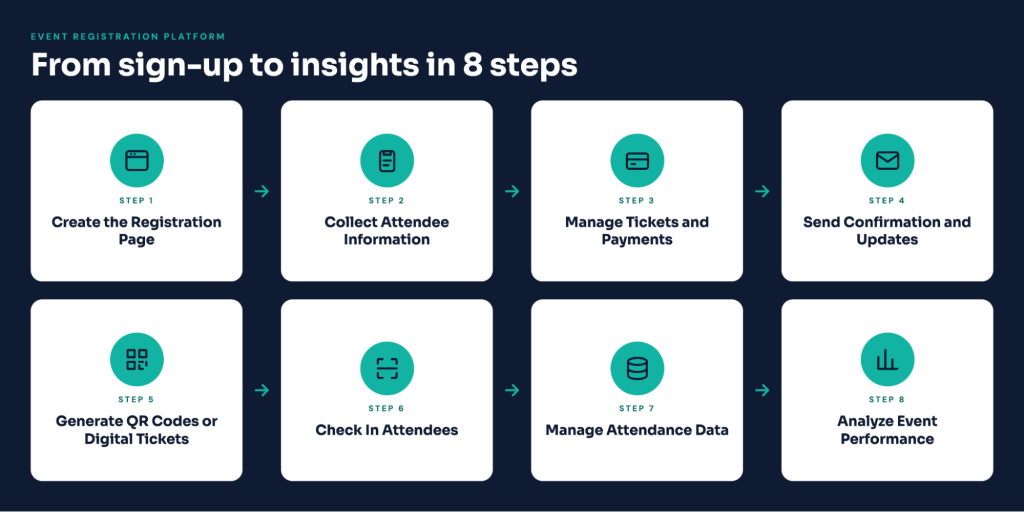
Step 1 – Create the Registration Page
Everything starts with the registration page, the public face of your event. Most platforms offer templates and drag-and-drop editors, so no coding skills are needed.
Organizers usually set up:
- Event details: name, date, time, location or virtual link, and description
- Branding: logo, colors, banner images, and custom domain
- Ticket options: free, paid, early bird, VIP, group, or member-only
- Registration rules: capacity limits, deadlines, and eligibility
A good page loads quickly, works on mobile, and clearly states what attendees get. The platform also generates a shareable link for social media, your website, or email campaigns.
Step 2 – Collect Attendee Information
Once someone lands on the page, they fill out a registration form. This is where the platform gathers the data you need to run the event.
Typical fields include name, email, phone number, company, and job title. You can also add custom questions, such as:
- Dietary or accessibility needs
- T-shirt sizes for swag
- Session or workshop preferences
- How they heard about the event
- Emergency contact details
Most platforms support conditional logic, so a question appears only when it’s relevant. For example, if someone selects “Yes” to needing accommodations, a follow-up field asks for details. Forms also validate entries in real time, catching mistyped emails, missing fields, and duplicates.
Keep the form short, though. Every extra field gives people a reason to leave, so ask only for what you need now and collect the rest later. For a deeper look, see why event registration processes lose attendees and how to fix it.
Step 3 – Manage Tickets and Payments
For paid events, the platform handles ticketing and payments. Organizers can offer different ticket types, each with its own price, quantity, and sales window.
Common ticketing features include:
- Tiered pricing: general admission, VIP, student, or group rates
- Early bird pricing: discounted tickets for a limited time
- Promo codes: for partners, sponsors, or campaigns
- Add-ons: optional extras like workshops, meals, or merchandise
- Taxes and fees: calculated automatically, absorbed or passed to the buyer
At checkout, the platform connects to a payment gateway to process cards, digital wallets, and sometimes bank transfers. The payment processor encrypts and handles card details, which reduces your security burden. Every transaction, refund, cancellation, and transfer is recorded, so your financial data stays clean.
For free events, this step is replaced with a simple “reserve your spot” action. Waitlists can also activate when capacity is reached, offering spots to waiting guests if someone cancels.
Step 4 – Send Confirmation and Event Updates
Right after registration, the platform sends an automated confirmation by email or SMS. It typically includes:
- A summary of the registration and ticket
- Event date, time, and venue or access link
- A payment receipt
- A calendar invite (Google, Outlook, or Apple)
- Instructions for changing or canceling
The platform also supports ongoing communication, such as reminders, agenda updates, speaker changes, and travel information. You can segment audiences, so VIP ticket holders get different messages than general attendees. Automated reminders a week and a day before the event help reduce no-shows.
Step 5 – Generate QR Codes or Digital Tickets
After registration, each attendee receives a unique digital ticket, usually with a QR code or barcode tied to their record in the system.
Digital tickets offer several advantages over paper:
- Fast entry: one scan replaces searching printed lists
- Fraud prevention: each code is unique and works only once
- Convenience: attendees can save tickets to their phone wallet or print them
- Lower costs: no printing or mailing
Some platforms also generate printable name badges showing name, company, and ticket type, plus a QR code for session scanning. Color-coding can separate speakers, sponsors, staff, and guests.
Step 6 – Check In Attendees
On event day, check-in is where the platform pays off. Staff use a mobile app, tablet, or dedicated scanner to read each attendee’s QR code. The system lsxkuxfig verifies the ticket, marks the person as checked in, and flags issues such as duplicate scans, invalid tickets, or unpaid registrations.
Most platforms offer several check-in methods:
- QR code scanning: the fastest option for most events
- Name search: useful when someone forgets their ticket
- Self-service kiosks: attendees check themselves in and print their own badges
- On-site registration: walk-ups can register and pay at the door. Planning a separate workflow for them keeps the regular queue moving, as covered in this guide to managing last-minute event registrations.
Check-in apps often work offline and sync once the connection returns, which helps at venues with weak Wi-Fi. Real-time tracking also lets organizers see who has arrived, spot bottlenecks, and adjust staffing on the spot.
Step 7 – Manage Attendance Data
Check-in is only the first layer of attendance data. Many platforms also track session-level attendance, so you can see who attended which workshop, keynote, or breakout room, either by scanning badges at session entrances or through virtual event analytics.
Your attendance records become a central database showing who registered, who paid, who showed up, and who didn’t. You can filter and export it by ticket type, registration date, or any custom field. This makes it easy to:
- Thank attendees who came
- Send recordings to those who missed it
- Issue certificates or continuing education credits
- Reconcile headcounts for catering and vendor invoices
Step 8 – Analyze Event Performance
After the event, the platform’s analytics turn raw data into insights. Dashboards and reports typically cover:
- Registration trends: how sign-ups grew and which days drove spikes
- Traffic sources: which channels (email, social, partners, ads) brought the most registrations
- Revenue: ticket sales, discount usage, refunds, and add-ons
- Attendance rate: the percentage of registrants who showed up
- Session popularity: which talks or workshops drew the biggest crowds
- Attendee feedback: survey results and satisfaction scores
These numbers show what worked and what didn’t. If one partner delivered 40% of your sign-ups, you know where to focus next time. If a ticket tier barely sold, you can adjust its pricing. Over several events, the data also supports better forecasts and budgets.
What Happens to Attendee Data After Registration?
Once someone registers, their information is stored in a secure database managed by the platform. From there, it flows to several places, depending on your setup.
Storage and access. Data is typically encrypted in transit and at rest. Role-based permissions control who can view or export it, so a check-in volunteer doesn’t need access to payment records.
Integrations. Many platforms sync registration data with a CRM like Salesforce or HubSpot, an email tool like Mailchimp, accounting software, or a webinar platform, so you don’t need to copy lists between systems by hand.
Privacy and compliance. Reputable platforms support regulations such as GDPR, CCPA, and India’s Digital Personal Data Protection Act through consent checkboxes, data export and deletion requests, and retention settings. Organizers should still collect only what they need and be transparent about how it’s used.
Post-event use. Attendee data supports follow-up marketing, sponsor reporting, and future planning. With consent, inviting past attendees back is usually far cheaper than acquiring new ones.
How Does Registration Software Handle Large Events?
Large events bring challenges that small ones don’t: traffic spikes, complex ticketing, thousands of check-ins, and multiple teams working at once. Modern platforms handle this in several ways.
Scalable infrastructure. When ticket sales open, thousands of people may hit the page within minutes. Cloud-based platforms scale server capacity automatically to avoid crashes, and some offer virtual queues during extreme demand.
Multiple ticket types and group registration. Large events often need dozens of ticket categories, corporate bulk purchases, and group registrations where one person registers a team and assigns attendee details later. Approval-based registration is also supported for events that vet applicants.
Session and capacity management. Multi-track conferences can enforce seat limits per room. The software tracks capacity in real time and closes full sessions or opens waitlists.
Efficient check-in at scale. Multiple check-in stations, pre-printed badges, and fast scanning apps keep lines moving. Sending the QR code in pre-event emails reduces queues significantly.
Team collaboration and permissions. Role-based access lets staff, volunteers, sponsors, and exhibitors see only what they need. Exhibitors can use lead retrieval tools to scan badges, while the finance team sees only transaction reports.
Real-time reporting. Live dashboards show registrations, revenue, and check-ins as they happen, so decisions don’t wait for end-of-day reports.
Online Registration vs Manual Registration
Some organizers still rely on paper forms, phone calls, or spreadsheets, especially for small gatherings. Here is how the two approaches compare.
| Factor | Online Registration | Manual Registration |
| Speed | Instant sign-up, available 24/7 | Slow, limited to working hours |
| Accuracy | Validated fields reduce errors | Prone to typos and lost forms |
| Payments | Automated, secure, reconciled | Cash or checks, manual tracking |
| Communication | Automatic confirmations and reminders | Individual calls or emails |
| Check-in | QR scan in seconds | Searching printed lists |
| Data and reporting | Real-time analytics | Manual compilation afterward |
| Scalability | Handles thousands easily | Becomes unmanageable quickly |
| Cost | Software fees, but lower labor | Low upfront, high staff time |
| Attendee experience | Convenient and professional | Slower and less flexible |
Manual registration works for a dozen friends or colleagues. Once payments, multiple ticket types, or more than a few dozen people are involved, time costs and errors rise quickly, and you lose the audience insights an online platform provides.
Simplify Your Event Registration From Sign-Up To Check-In.
Conclusion
An event registration platform connects every stage of the attendee journey, from the registration page and payments to QR tickets, check-in, and analytics. Attendees get a faster, smoother experience, and organizers get accurate data, fewer manual tasks, and live visibility into who is coming.
Manual methods can work for small, informal gatherings, but once payments, multiple ticket types, or larger crowds are involved, an online platform is the more reliable choice. When comparing options, look at your event size, ticketing needs, check-in tools, integrations, and data privacy features, and try a demo before you commit.
FAQs
It centralizes sign-up, payments, ticketing, check-in, and reporting in one system.
Platforms charge per ticket, by subscription, or through custom enterprise plans. Compare all fees, including payment processing.
Yes. They send unique access links, connect with video tools, and track online attendance. Hybrid events can use both in-person and virtual tickets.
Reputable platforms use encryption, secure payments, and access controls. Choose one with privacy compliance, and collect only necessary data.
Usually not. Registration is browser-based, and QR tickets work from email or a phone wallet. Only check-in staff need an app or scanner.